Welcome to our Support Center
Tickets
The “Ticket” and “Task” terms are used for the same thing. A request, ticket, task, enquiry etc. The Tickets menu gives you an opportunity to find a list of all tickets regarding all the activities of the business. This is composed of tickets that are being approved, in case the chosen business process needs it, and tickets that are still under active progression. The Tickets menu provides a list of tickets, including those under approval and those that are in-progress.

Creating a New Ticket
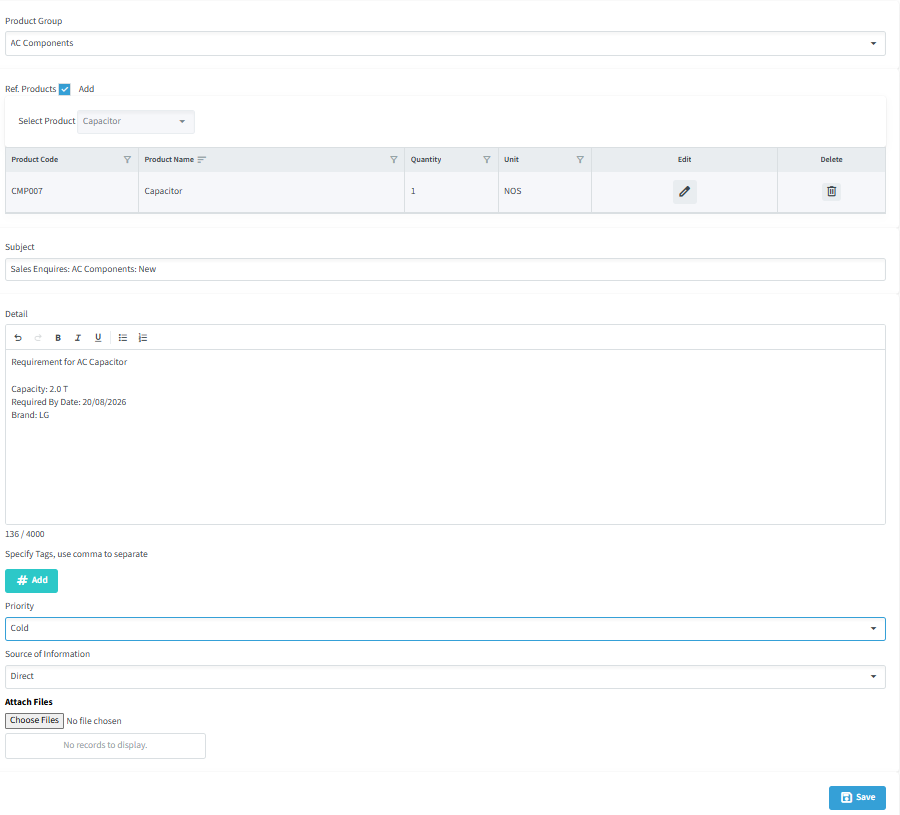
- When creating a new ticket, you must select the Business Process it belongs to, which ensures the ticket follows the correct workflow and approvals.
- Next, choose the Product Group, which directs the task to the right people based on the issue type. After selecting the Business Process, the related Subject will appear automatically, and you can add more information if needed.
- Once you choose the Product Group, select the specific product by checking the Ref. Products box. This will open the Select Product drop-down menu, where you can choose your product.
- Any Custom Fields linked to the product group will also appear and must be filled in.
- Select the priority (e.g., Normal, High, Critical) of the product.
- You can attach files for reference with the help of Attack Files option.
- Once all details are entered, click “Save” to generate the ticket.
Creating Ticket for Another User (as Customer Care)
- Navigate to the main Tickets menu. Click the New Task / Ticket to open the ticket creation page, where you can begin entering the ticket details.
- After clicking on “New Task / Ticket”, you will see an option Customer Care: Task For Other. This will open a form where you can enter the necessary details for creating a ticket on behalf of someone else.
- The system allows you to create a task on behalf of another person, like a customer or supplier.

- On the “Add New Ticket” page, check the box labeled “Customer Care: Task For Other”.
- The form will expand, prompting you for details like an email address or phone number.
- Enter the person’s email or phone number and click the arrow button beside the box.
- If the system matches an existing user, their information will be retrieved automatically.
- If no match is found, you can manually enter their contact information.
Note
For this feature to work correctly, the individual must already exist in the system’s contact list for the task to be correctly associated with them.
- Properly categorizing a ticket is crucial for routing it to the right team and ensuring a fast resolution.
- Business Process and Product Group:
- First, select the Business Process (e.g., Customer Complaint, Supplier Registration) to ensure the ticket follows the correct workflow and approvals.
- Next, choose the Product Group to direct the task to the team responsible for that product.
- Subject, Products, and Custom Fields:
- After selecting the Business Process, the Subject line will auto-populate, which you can then edit if needed.
- Select the specific Product related to the ticket.
- Fill in any Custom Fields that appear, as these are linked to the product group and must be filled in as required.
- Saving the Ticket:
- After completing all mandatory fields, click “Save” to generate the ticket.Your new ticket will now appear in the “Existing Tickets” list.