Project
Navigation
- Click Tasks in the top navigation menu.
- Select Projects List from the dropdown menu.

The Projects module enables you to create, organize, and monitor projects from initiation to completion. It provides a centralized workspace for managing project information, assigning users, linking tickets, tracking progress, and planning project activities using Gantt Charts.
Users with the appropriate Project Management permissions can access this module to create new projects, update existing ones, monitor project status, and close projects once they are completed.
Key Features
- Create and manage projects.
- Assign users to specific projects.
- Link existing tickets or create new tickets within a project.
- Monitor project progress and associated tasks.
- Plan project timelines using Gantt Charts.
- Close completed projects.
Project List
The Project List serves as the central view for managing all projects in the system. It displays every project that the logged-in user has permission to access, along with essential information such as the Project Code, Project Title, and Current Status.
Projects can be filtered based on their status to help users quickly locate active or completed work.
Available Views
- All – Displays every project available to the user.
- Open – Displays only projects that are currently active.
- Closed – Displays projects that have been completed or closed.
From the Project List, users can:
- Create a new project.
- View or edit project details.
- Update the project status.
- Export the project list to Excel.
- Manage project user permissions.
This interface provides a quick overview of all projects and serves as the starting point for project administration.

User Permissions
Each assigned user can be granted one or more of the following permissions:
- View Project – Allows the user to view project details.
- Edit Project – Allows modification of project information.
- View Task – Allows viewing of tasks associated with the project.
- Add Task – Allows creation of new tasks within the project.
- Remove Task – Allows deletion of project tasks.
- View Asset – Allows viewing of assets linked to the project.
- Add Asset – Allows adding new assets.
- Edit Asset – Allows modifying asset information.
- Remove Asset – Allows deleting project assets.
- Advance Permission – Grants additional project management privileges as defined by the system configuration.
Permissions can be enabled or disabled independently by selecting or clearing the corresponding checkbox.
Creating a New Project
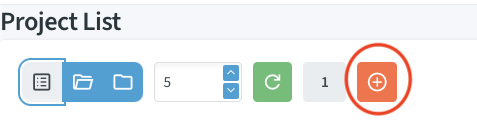
To create a new project:
- Navigate to the Projects module.
- Click the New Project (+) button.
- Enter the required project details, including:
- Project Title
- Customer Name
- Start Date
- End Date

4. Verify the information entered.
5. Click the ✔ (Tick) button to create the project.
The newly created project will appear in the Projects list and will be available for further management.
Managing Project Users
Project access can be restricted to selected users by assigning project permissions.
Steps to add a user
1. Click the button which has a down button.

2. Click on red “+” button circle.
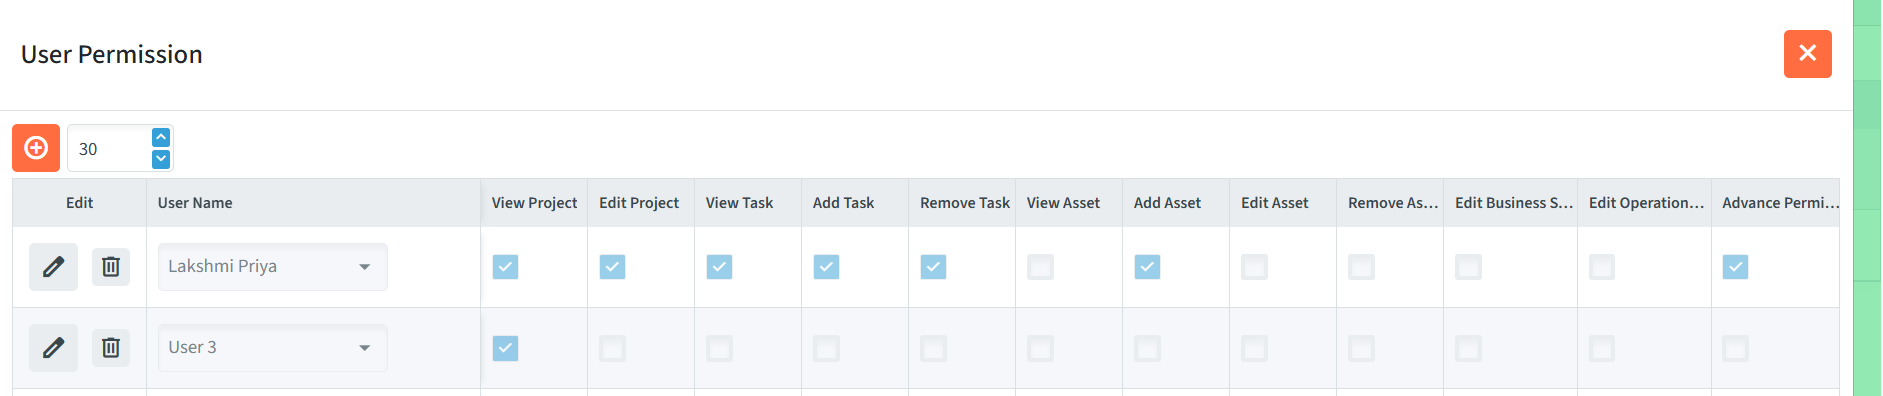
3. Choose the user from the list.

4. Click on the tick (✔) button.
Editing or Removing User Permissions
To modify an existing user’s permissions:
- Open the User Permission window.
- Locate the user in the list.
- Update the required permission checkboxes.
- Click on the tick mark to save.

To remove a user from the project:
- Locate the user in the permissions list.
- Click the Delete icon.

Removing a user revokes all access to the selected project while leaving the project and its associated data unchanged.
Viewing and Managing a Project
Selecting a project from the list opens its detailed view, where you can monitor project activities and manage associated tasks.
From the project view, you can:
- View project information.
- Review all tickets associated with the project.
- Monitor task progress.
- Approve tickets.
- Add follow-ups.
- Access the project Gantt Chart.
The ticket management interface within a project is identical to the standard Tickets module, providing a consistent user experience.
Add Existing ticket
- You can add a ticket that already exists to your project.
- Simply type the ticket ID into the field
- click the “Add” button.


Add a New Ticket
This function works the same way as adding a regular ticket.
Please refer to the this article for more details – Ticket
How to Create a Gantt Chart

- The system allows you to create Gantt charts to visually plan and track your project’s execution. The interface is split into two main tabs:
- Original Message: This tab lets you view complete details related to all tickets under the project, including requester information.
- Create Project Flow: This is where you can design and generate a Gantt Chart for your project.
Generating and Saving Your Chart
- Set Up the Project Flow: In the “Create Project Flow” tab, select the appropriate workflow and fill in the required project details such as start and end dates.You can also define other important parameters like team assignments and activity types.Most fields are self-explanatory.
- Generate the Chart: Once the setup is complete, click the Generate button to create the initial Gantt chart.
- Save the Chart: You can make adjustments to the chart as needed and then click Save to store it.The chart will be saved with the selected date and time, or the current date and time if none is specified.
Managing Chart Versions
- This versioning allows you to track the progress and changes of the project over time and maintain a clear log for future reference.
- The system maintains a history of your saved Gantt charts.
- When you return to this section later and click the generate button again, a history of all saved versions of the chart will be displayed.
- You can load any previous version to review past plans.
- If you make changes, you can save it again as the latest version.