Navigating the Ticket List
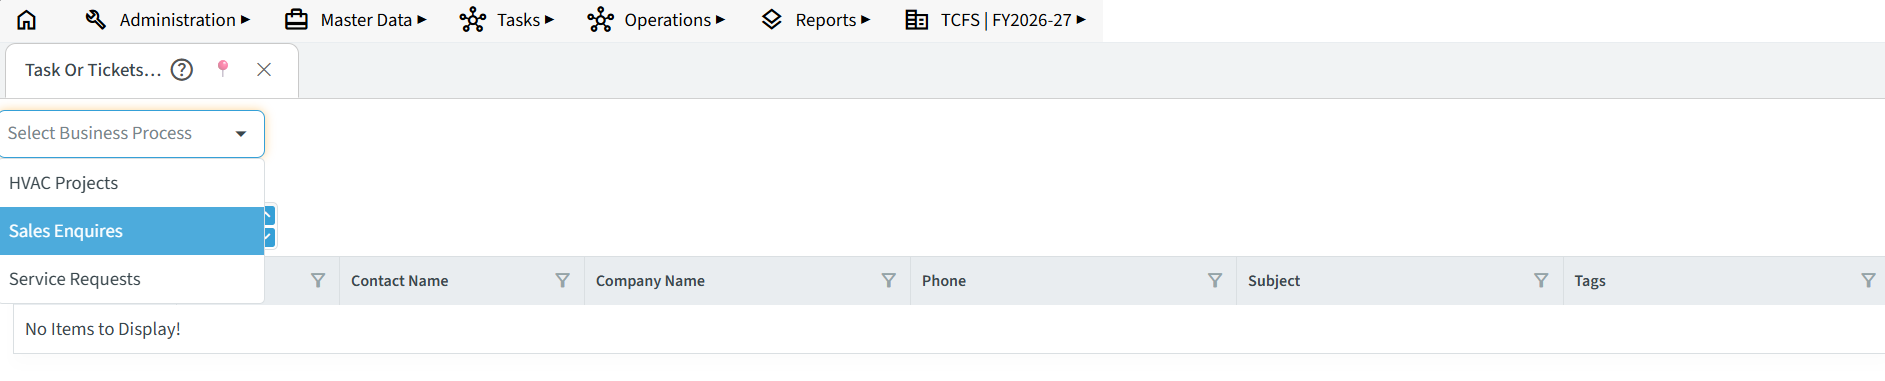
When you click on the Tasks / Tickets menu, you will see the initial view below. By default, no records are displayed until a process is chosen.

Selecting a Business Process
- Click the Select Business Process drop-down menu in the top-left corner.
- Choose your desired business process (e.g., Sales Enquiries).
Once selected, the full Ticket List view will load, displaying all corresponding tasks and filter options for that process.
Approved Records View
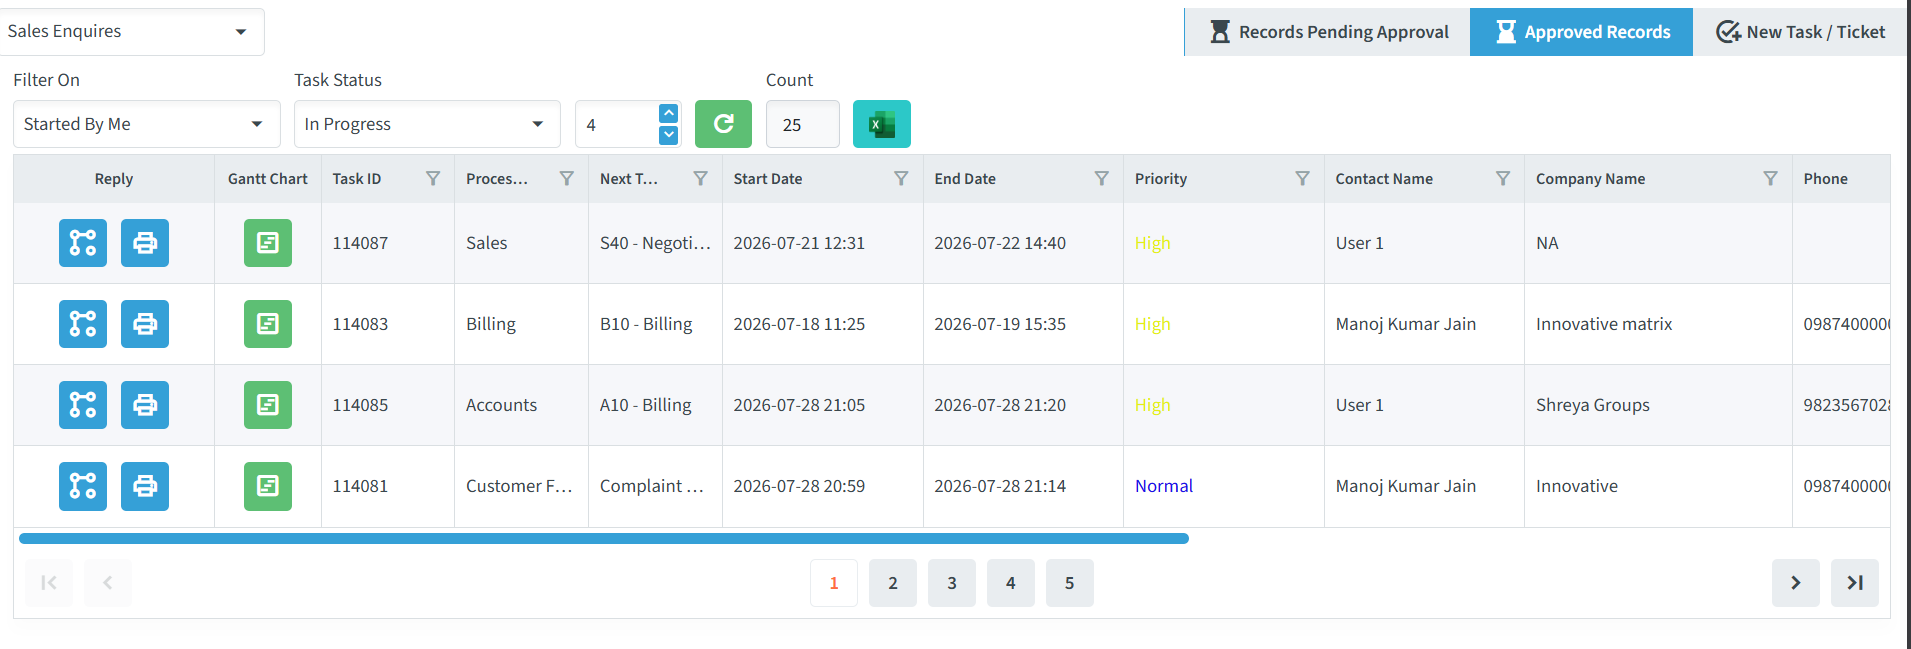
Once a Business Process is selected, the system loads the Approved Records tab by default. In this view, you will find the following controls and options:
- Business Process Drop-down: Switch to a different process group at any time.
- Record Tabs:
- Records Pending Approval: Switch to view tickets awaiting approval.
- Approved Records: Displays active tickets that have passed the approval stage (currently active view).
- New Task / Ticket: Click to create a new record for the selected process.
- Filter On: Filter records based on ownership (e.g., Started By Me).
- Task Status: Filter tickets by their current stage (e.g., In Progress, Closed Success, Closed Fail, Unqualified Closed).
- Page Size: Use the number selector to change how many rows display per page.
- Refresh Button: Click the green circular icon to reload the list with updated data.
- Count: Displays the total number of records found matching your active filters.
- Export: Click the teal Excel icon to download the filtered list as a spreadsheet.
Records Pending Approval
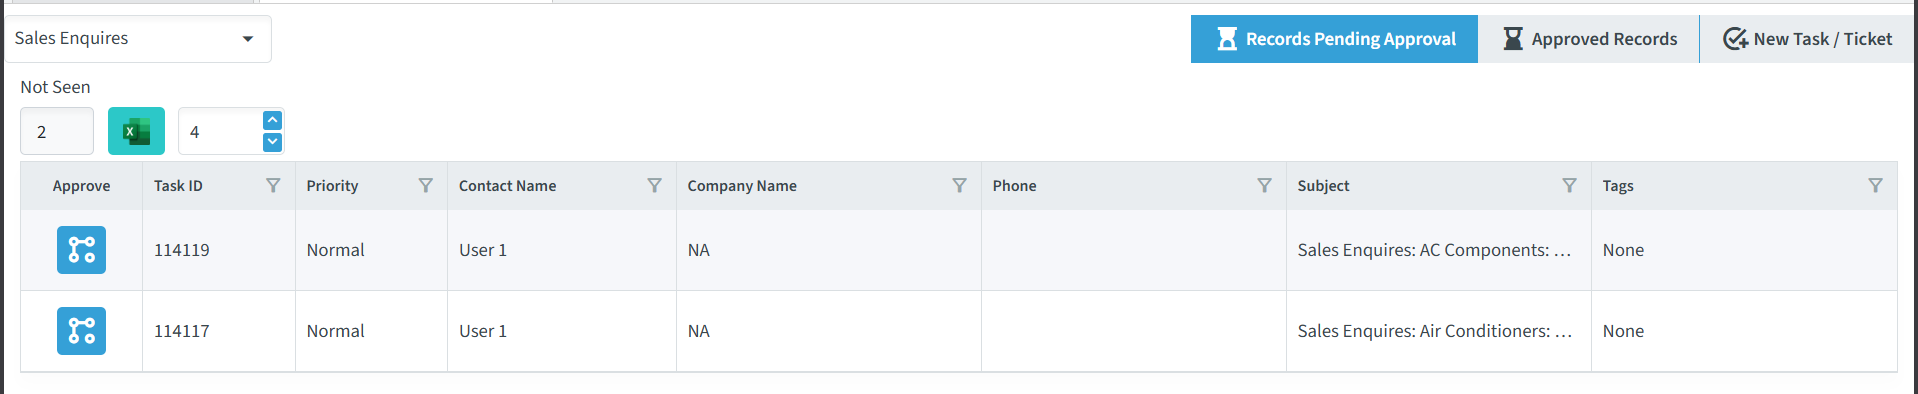
The Records Pending Approval tab displays all unassigned tickets awaiting review. From here, you can approve a ticket and assign it to a specific workflow, team, or user to begin processing.
Approving and Assigning a Ticket
- Locate the ticket in the Records Pending Approval list and click the Approve button in its row.
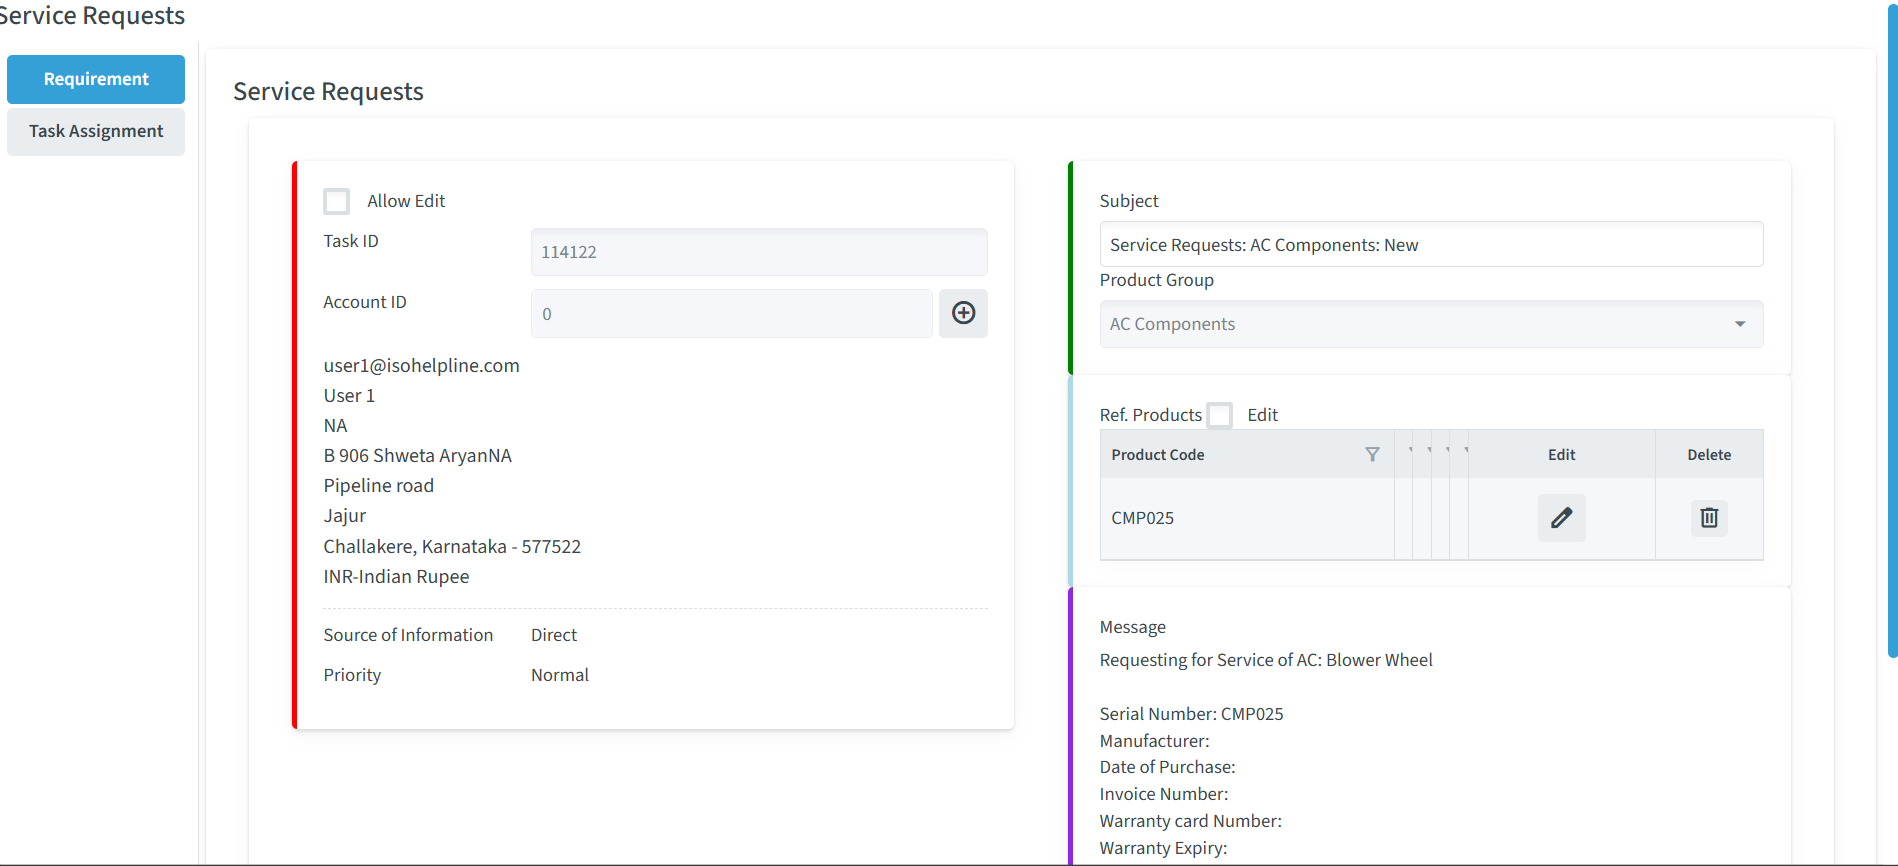
- The Ticket Approval screen will open, featuring two main sections:
- Requirement: Displays the full details and history of the initial request.
- Task Review & Assignment: Allows you to configure approval settings and assign the task.
Task Assignment
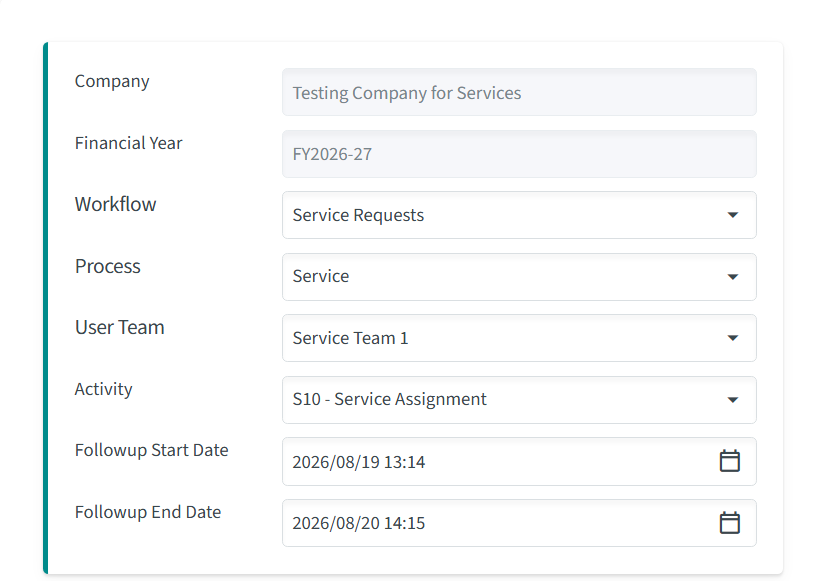
The Task Assignment tab allows you to manage the current phase of a ticket and assign the next action. It is divided into two main panels: Current Stage and Upcoming Stage.
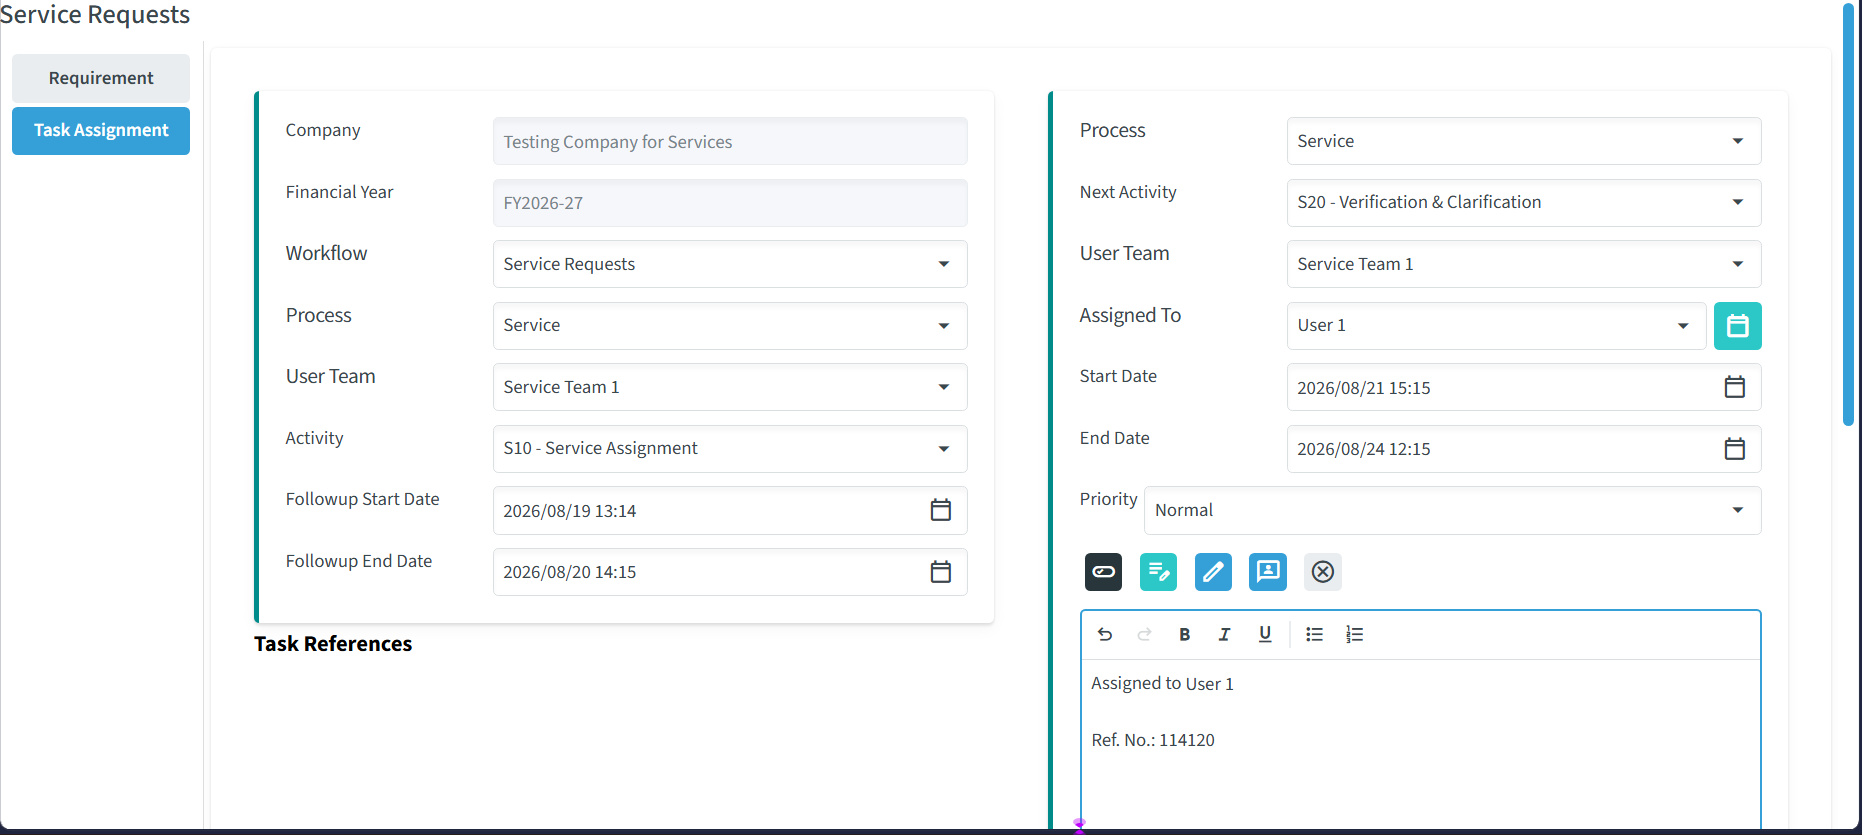
1. Current Stage (Left Panel)
This panel shows the active phase of the ticket and allows you to make necessary updates.
- Process Details: View or set the current Workflow, Process, User Team, and Activity.
- Followup Dates: Set the Followup Start Date and Followup End Date for this active phase.
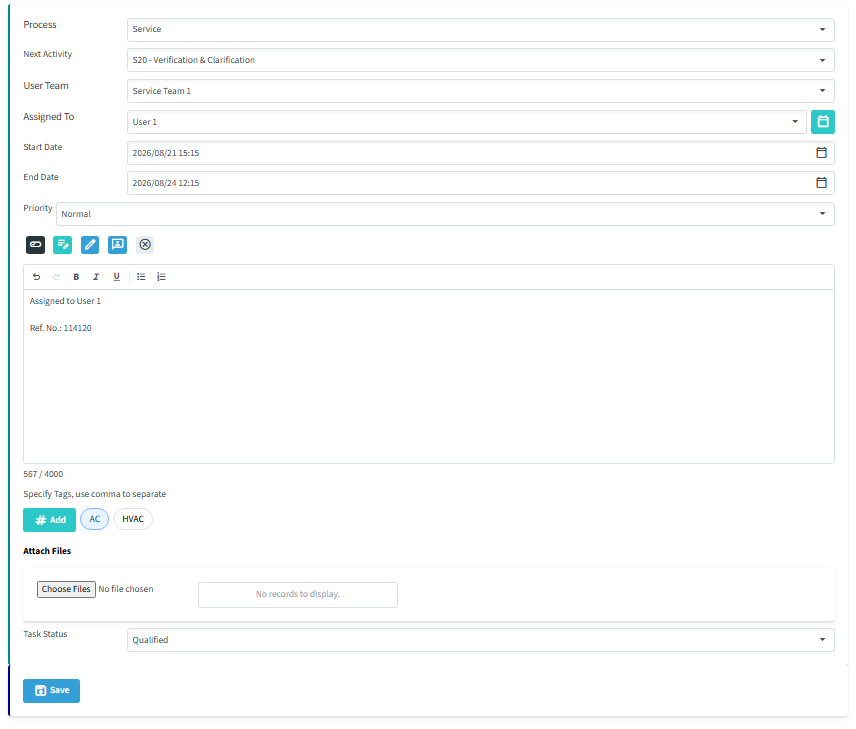
2. Upcoming Stage (Right Panel)
This panel is used to configure and route the ticket to its next step.
- Assignee & Process Details: Select the Process, Next Activity, User Team, and use Assigned To to delegate the task to a specific team member.
- Schedules: Set the Start Date and End Date for the upcoming activity.
- Check Schedule: Click the calendar icon next to Assigned To to view the employee’s availability. This helps prevent overbooking and balances team workload.
- Priority: Set the urgency level (e.g., Normal, High) from the Priority drop-down menu.
- Message / Notes: Use the text editor to add instructions, assignment notes, or reference details.
- Tags: Type keywords separated by commas in the Specify Tags field and click + Add to categorize the ticket.
- Attach Files: Click Choose Files to upload supporting documents or images.
- Save & Submit: Verify the Task Status (e.g., Qualified) and click Save to send the ticket to the next assigned stage.
New Task / Ticket
Click the New Task / Ticket button in the top-right corner to open the creation form and submit a new ticket.
For detailed, step-by-step instructions on creating and submitting records, please refer to the Ticket guide.