Business Process Permissions
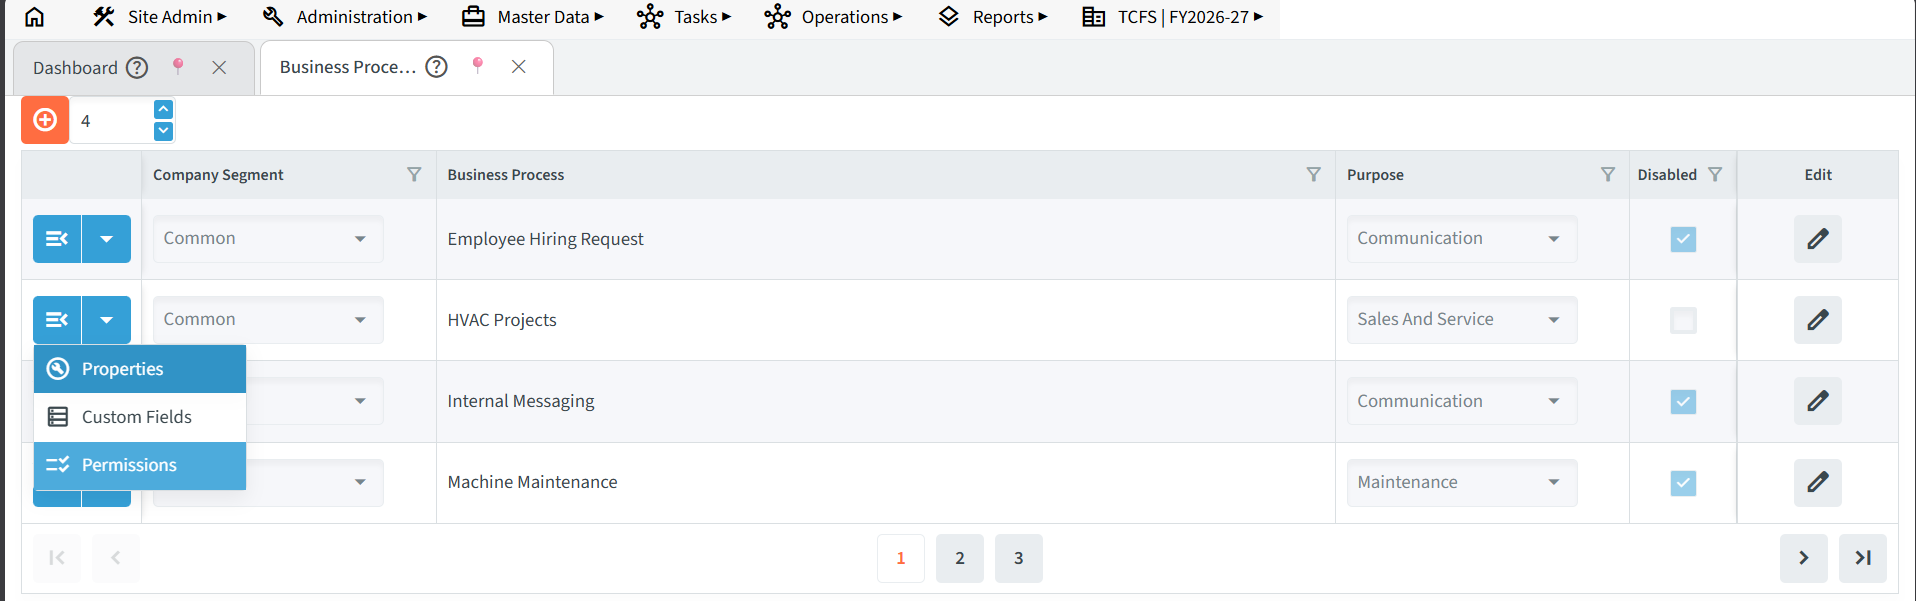
How to Access Permissions
- Go to Administration in the main navigation menu.
- Select Business Process then Business Process Designer.
- Choose your target business process and click on the dropdown.
- Click the Permissions option.
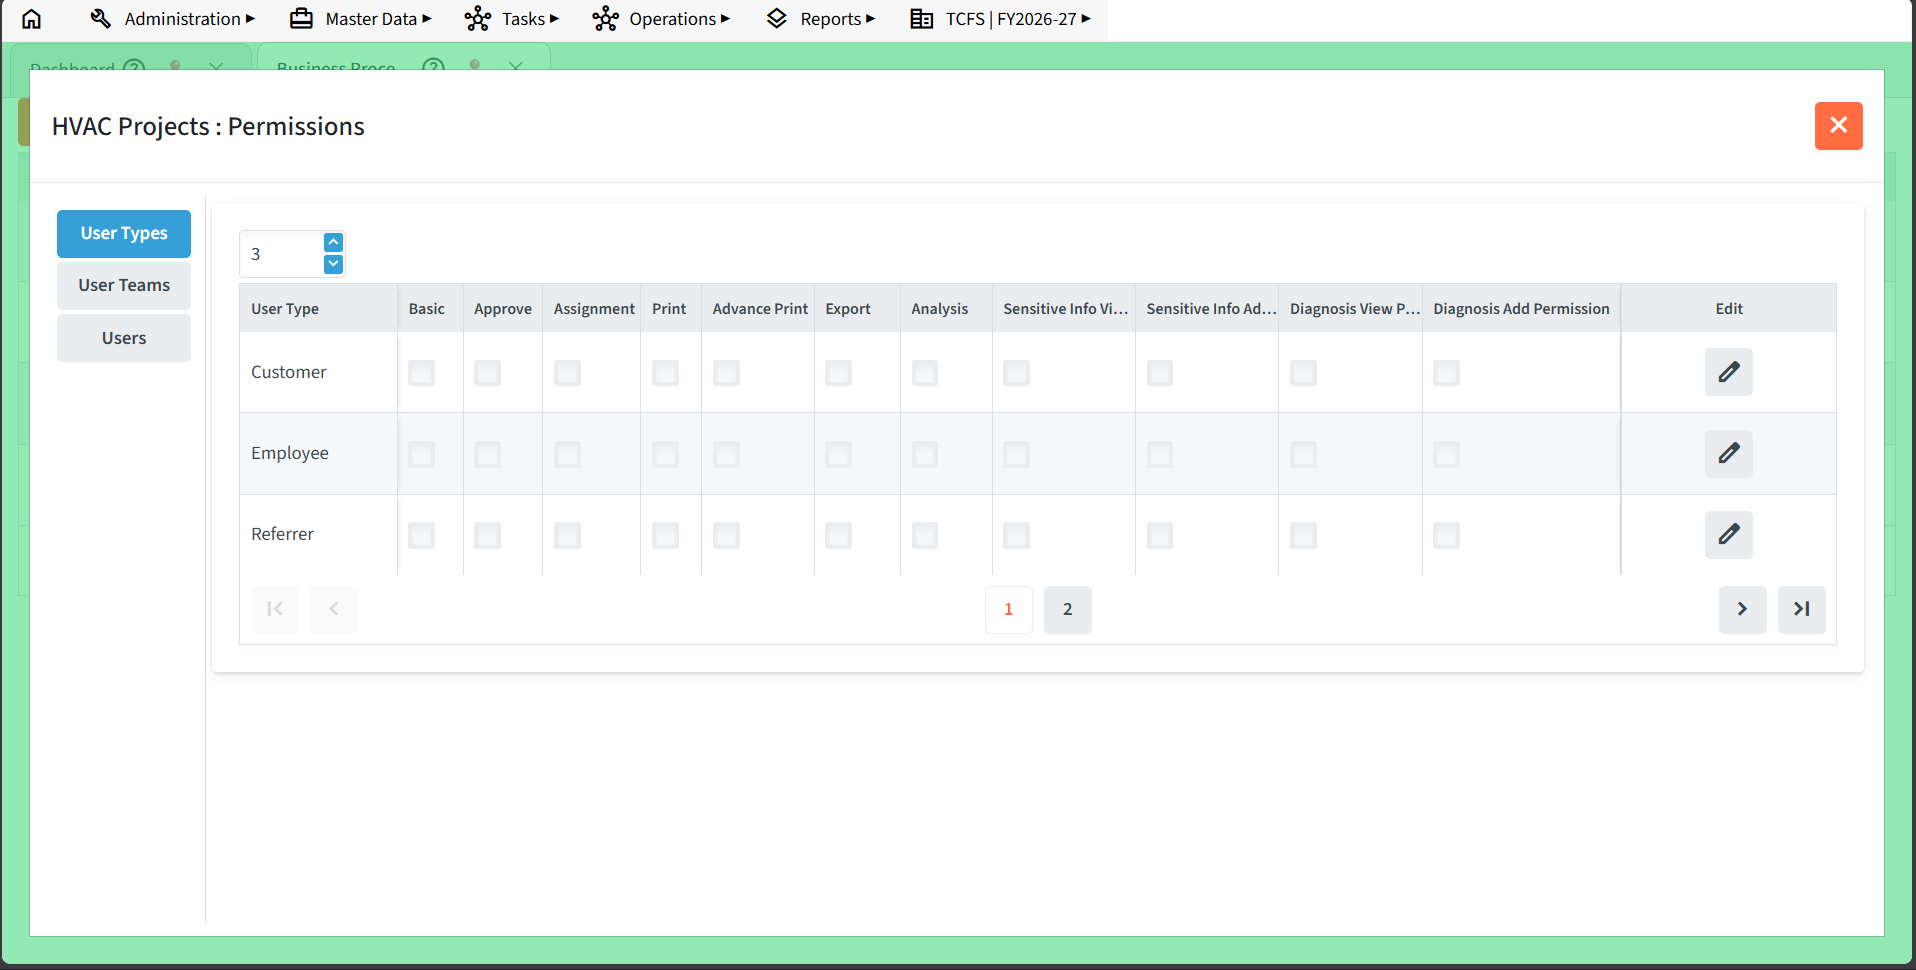
Permission for business processes can be given for three levels of users:
1. User Type
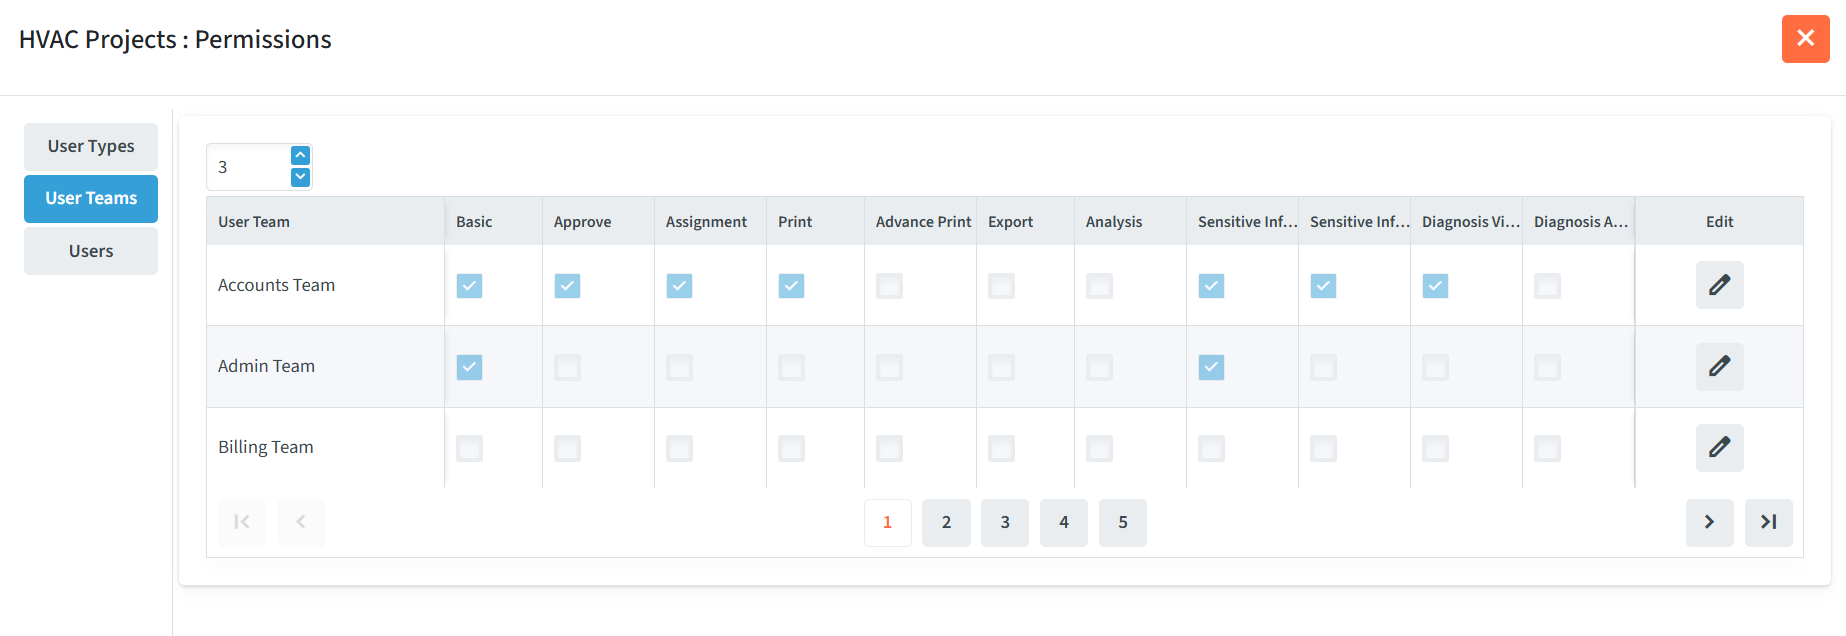
2. User Teams / Groups
3. Users
Permission levels:
1. User Types: Defines access based on broad role categories (e.g., Employee, Customer).
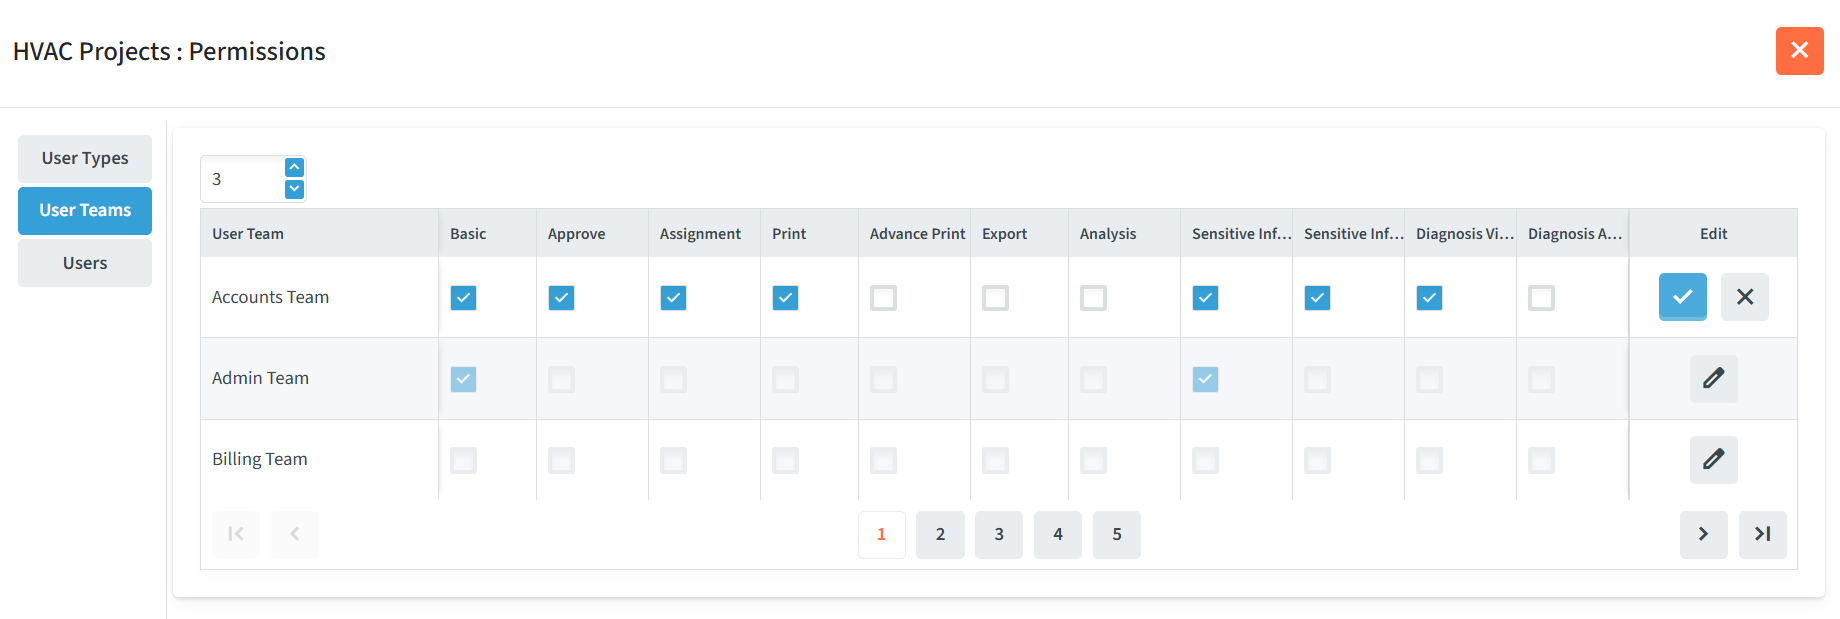
2. User Teams / Groups: Defines access based on specific departments (e.g., Marketing, Sales).
3. Users: Defines access for specific individuals, with an exclusive option to add users and manage their access.
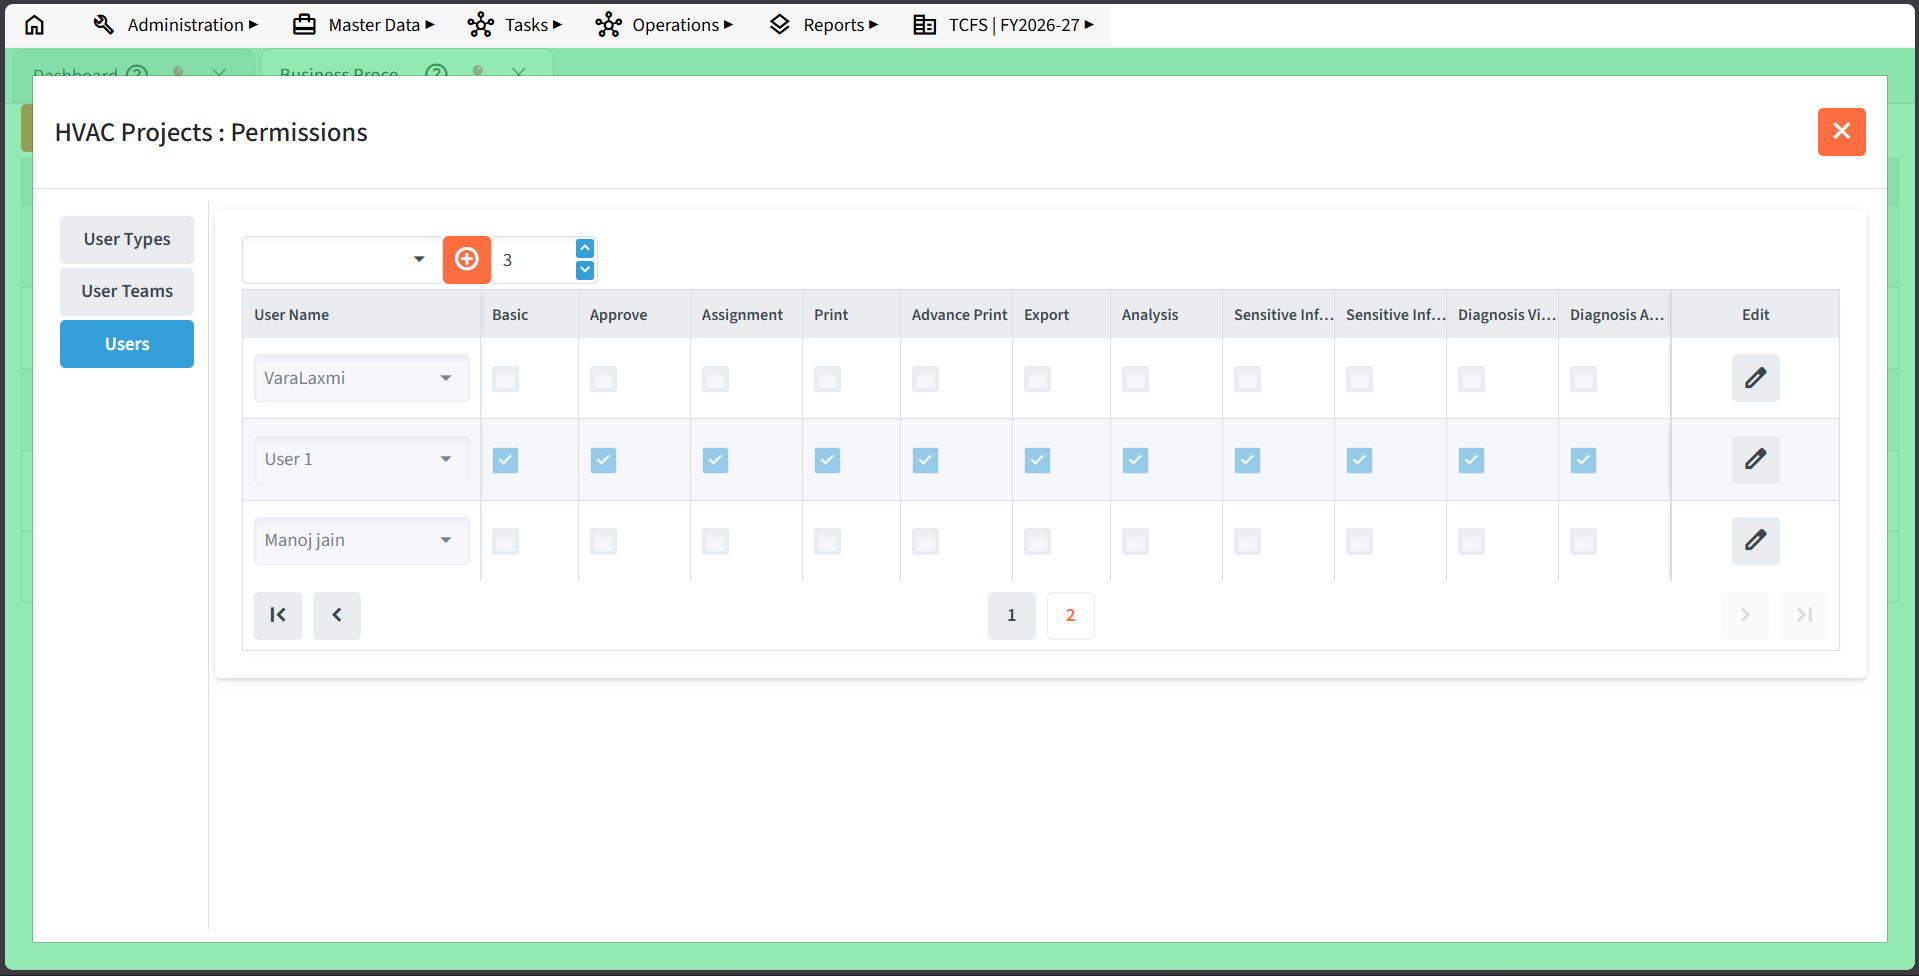
Available Permissions
All three levels share the same set of core permissions
- Basic Permission –
- This will allow creating a ticket and add follow-up to tickets.
- Approve Permission –
- This setting allows a user to approve tickets, but only if the business process has Approval set to Yes. If the process does not require approval, this permission is ignored.
- When a business process requires approval, users with this permission can review and approve the ticket. Once approved, the system will follow the defined workflow, starting with the first step, where the task is assigned to a user team and a specific user.
- If the business process does not require approval, then the ticket is automatically considered approved by the user who created it, and no further approval is needed.
- To use this approval permission properly, the user must also be a member of at least one team assigned in the first step of the workflow. This ensures the task can be assigned smoothly to the right team and person after approval.
- This feature is useful for processes like Customer Complaint or Purchase Requests, where manager or admin approval is required before starting the actual task.
- Assignment Permission –
- Process Assignment means moving a ticket or task to the next step in the workflow and also assigning it to the right team and user who will handle it.
- In some cases, like continuous production, the person handling the current step will directly send the task or material to the next process. This is common in situations where all teams are part of the same company or department, and the workflow is well known. Usually, there’s only one team involved, and the process flows smoothly because everyone knows their role.
- In other situations, like interior design projects or construction work, some processes are outsourced to external teams. Here, the Project Manager or someone from their team will decide who should handle the next step. They will assign the task to the appropriate team and person for the next process in the workflow.
- This feature ensures that every task is passed forward properly, to the right people, at the right time, so that the entire process continues without delay.
- Analysis Permission –
- This permission will allow you to export and analyse business process data.
- Export Permission –
- This permission allows the user to export business process data from the system.
- Sensitive Info View Permission –
- This permission allows the user to view sensitive information available in the business process or ticket.
- Without this permission, sensitive information will not be visible to the user.
- Sensitive Info Add Permission –
- This permission allows the user to add sensitive information to the business process or ticket.
- Without this permission, the user cannot add sensitive information.
- Diagnosis View Permission –
- This permission allows the user to view diagnosis details available in the business process or ticket.
- Without this permission, diagnosis details will not be visible to the user.
- Diagnosis Add Permission –
- This permission allows the user to add diagnosis details to the business process or ticket.
- Without this permission, the user cannot add diagnosis details.
User-Level Permissions
While User Types and Teams share the same base permissions, the Users tab includes an exclusive management action:
- Add & Manage Users (+): Click the
+icon to add an individual user and customize their complete access to this business process.
Modifying Existing Permissions
1. Select the Level: Choose User Types, User Teams, or Users from the left panel.
2. Click Edit: Find the target row and click the Edit button (✏️ icon) located in the rightmost column.
- Adjust Access:
- Check a box to grant a permission.
- Uncheck a box to revoke a permission.
3. Save Changes: Click the Checkmark (✔️) icon in the Edit column to save your updated permissions.