Records
A Record is a business document created and managed within the application. Depending on the enabled record types, a record can represent documents such as a Delivery Challan for Supply, Quotation, Sales Invoice (SI) or Sales Order. Records can be attached to tickets, printed, and tracked throughout their lifecycle.
Creating and Saving a Record
To create a new record:
- Navigate to the Operations > Sales Records.
- Select Voucher Type (eg.,.. Delivery Challan for Supply, Quotation, Sales Invoice (SI), Sales Order).
- Click the orange New Record button at the top of the page.
- The New Record form will open.
- Enter all the required information.
- Click Save to create the record.
Record Approval Behavior
The way a record is saved depends on the Record Approval setting:
- Record Approval = Yes
- The record is saved as a Draft.
- It must be approved before it can be printed or attached to a ticket.
- Record Approval = No
- The record is saved as a Final document immediately.
- No approval is required before it can be used.
Note: The Master Permission for approving records is managed under the User menu.
Unable to Save a Record?
If you have completed all the required fields but are still unable to save the record, the Record Approval setting may not be configured correctly.
To resolve the issue:
- Navigate to Master Data → Users.
- Select the appropriate User Type (e.g., Customer, Employee, or Supplier).
- Select the user whose permissions you want to modify and click Permissions.
- Under Roles and Permissions, locate the Manage Records – Quotation, Invoices, PO, etc. permission.
- Check the box to enable the permission. The change is applied automatically.
- Ask the user to try creating the record again.
Once the appropriate setting is enabled, you should be able to save your record successfully.
There are some different Record type:
1. Delivery Challan for Supply
Purpose: A Delivery Challan for Supply is a document issued when goods are being delivered to a customer. It serves as proof that the goods have been dispatched and received, even if the invoice is generated later.
When to Use:
- When the invoice will be generated after the goods have been supplied.
- To maintain a record of items delivered, quantities supplied, and delivery details.
2. Quotation (QT)
Purpose: A Quotation is a formal document sent to potential customers containing prices, terms, and conditions for proposed products or services.
When to Use:
- When a customer requests a price before confirming an order.
- When negotiating deals or bidding for projects.

3. Sales Invoice (SI)
Purpose: A Sales Invoice is used when a product or service is sold to a customer. It includes item details, pricing, applicable taxes, and total amount.
When to Use:
- After customer confirms order or service is delivered.
- When you need to generate a bill for payment or delivery.
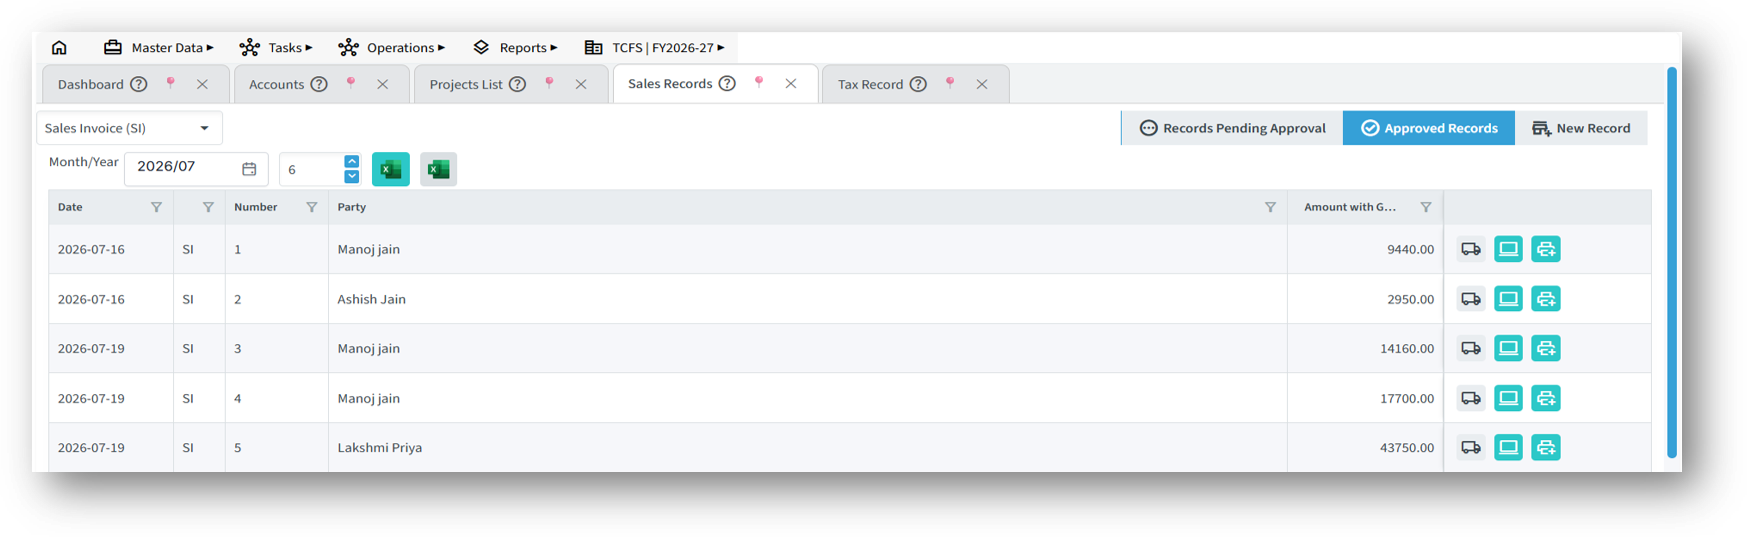
4. Sales Order
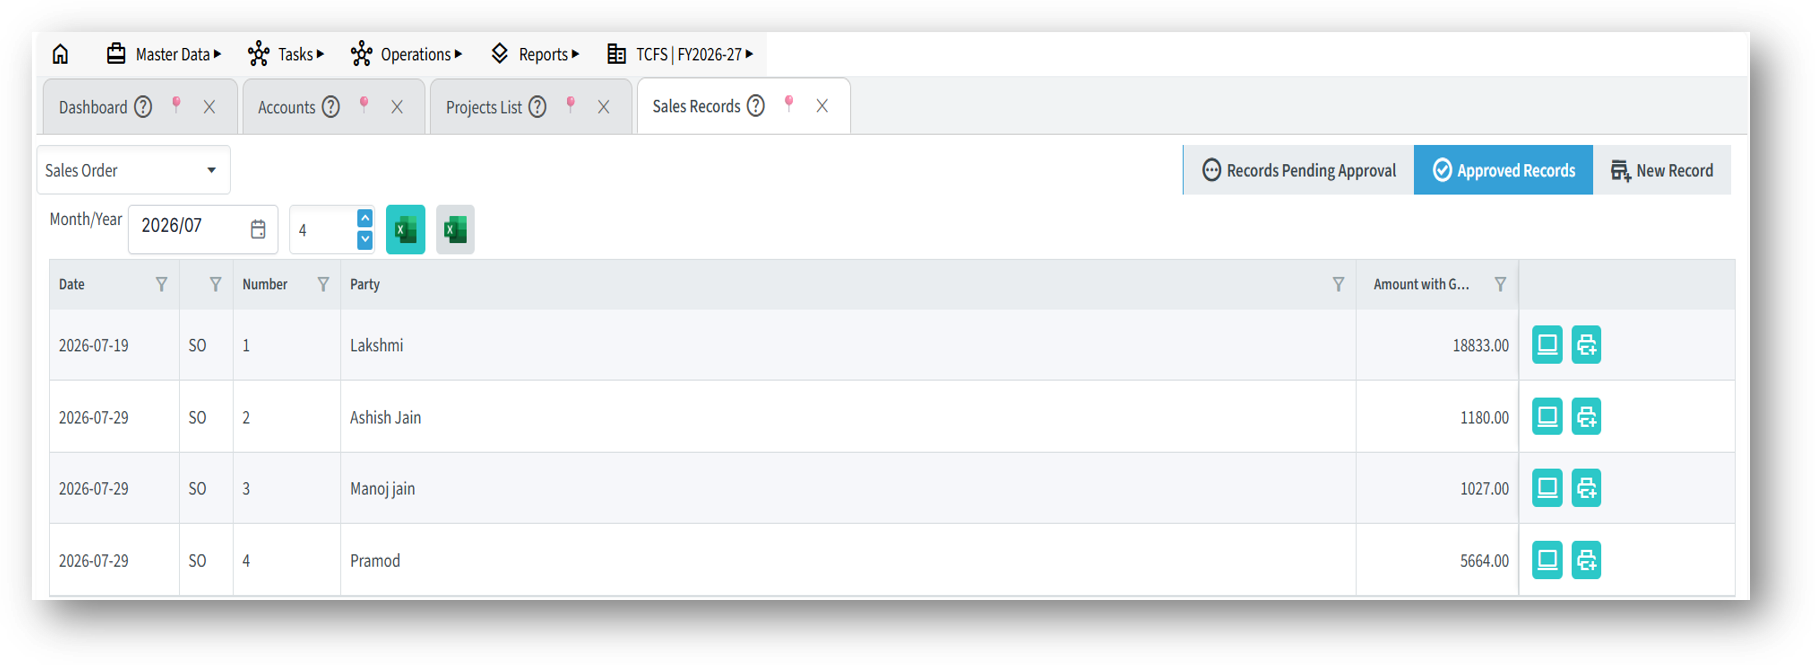
Purpose: Sales Order is a document created by the seller to confirm a customer’s order for products or services. It serves as an internal confirmation that records the items ordered, quantities, prices, and delivery details before the goods are dispatched or invoiced.
When to Use:
- When a customer places an order that needs to be confirmed before delivery.
- When you want to track pending customer orders.
- Before creating a Delivery Challan or Sales Invoice.
After filling out the basic information, the next step is to fill in the Customer and Ship Address details. These addresses must already be created in the Employee Account under the Lists menu, so they can be easily selected and fetched here. If you need to update or add any important information, you can do so by clicking the Edit button located next to the address fields.
Click on “Next“ button to move forward.
In Other Information section, you need to specify Party Ref Date and Ref No or Courier AWB, select Invoice Type (Regular and refers to an earlier quote) and select suitable Payment Method. In case the transaction has a Reverse Charge, it should be indicated as Yes.
On the other part of the record creation form, you will find additional sections such as the Discount Tab, Price Change, and fields for selecting Distributor, Dealer, Agent, Referrer, or Employee. These fields help make the record more detailed and complete. You can choose the relevant party involved in the transaction, apply discounts if applicable, and record any price changes.
Click on “Next“ button to move forward.
In the final step, choose the required Product or Service from the list, enter the necessary details like quantity and rate, and then add it to the record. Once all products are added and the information is complete, click on the “save” button to save the record. This completes the record creation process.
Now We will see how to approve the pending records:
In the pending section there is a records that need to be approve for further process.
If the marked button is not visible, it means the user does not have permission to perform any actions on the records. To enable this, we first need to assign the necessary permissions to the user.
To do this:
- Go to the Master Data menu.
- Open the User and select the user.
- Click on Permissions and select Records.
- Click Edit and assign the required permissions such as View, Add, Edit, Approve, or Print.
1. View Record
This permission allows the user to view all existing records such as quotations, invoices, purchase orders, etc.
- When to Use:
Assign this permission to users who need to monitor, review, or verify records — such as managers, auditors, or coordinators. - What Happens If Given:
The user can open any record and see full details like pricing, party details, terms, etc., but cannot make any changes to it. It’s a read-only access.
2. Add Record
This allows the user to create new records in the system like a new quotation, invoice, debit note, etc.
- When to Use:
Useful for Sales, Purchase, Support, or Finance team members who need to create documents or transactions as part of their work. - What Happens If Given:
The user will see an “Add New” button in the Records section and will be able to input all required data, select products, parties, apply discounts, and save the record.
3. Edit Record
This allows the user to make changes to records, even after they are saved — and sometimes even after approval (depending on system settings).
- When to Use:
Give this to team leads or department heads who may need to correct errors, update details, or revise records based on changes in client input. - What Happens If Given:
User can open any record they have access to and make changes to fields such as price, quantity, customer, terms, etc. This ensures flexibility in correcting mistakes, but should be given responsibly as wrong changes may affect reports or billing.
4. Approve Record
This permission allows the user to approve records. Some records like invoices or quotations require approval before further action like printing or processing.
- When to Use:
Give this to authorized people like Heads, Admins, or Supervisors who are responsible for quality checks or authorizing transactions. - What Happens If Given:
The user will see an “Approve” button after reviewing the record. Once approved, the record becomes final, and actions like billing, dispatch, or client communication can proceed.
- Print Record
This permission allows the user to view print previews, choose a print format, download PDF, and take printouts of records.
- When to Use:
Assign to roles like Sales, Billing, or Dispatch who need to send printed documents to clients, vendors, or internal departments. - What Happens If Given:
The user will be able to click the “Print” button in any record and choose the format (Invoice, Packing Slip, etc.), and generate a PDF or print copy.
So now, there is a button marked in the image above that you need to click to continue with further actions on the record such as printing, approval, or editing. These actions depend on the user’s permission settings, so make sure the required permissions are enabled for your user role. We will now look into those permissions and explain how they work for each action.
After completing the required fields in the record, you can scroll down to the Products and Services section. Here, you’ll notice a tick mark labelled “Approve” next to the listed product.
If you click on the tick mark, it means you are approving that particular product or service in the record.
Once approved:
- The “Save & Print” button becomes available, allowing you to finalize and immediately print the record (e.g., quotation, invoice).
- The “Save” button is always available by default, in case you want to save the record without printing.
Record has been approved now , will see in Approved section of the records